
You’ve decided you want some houseplants to complete the décor in your home. You checked out some nurseries and home improvement stores to see what they have and found some plants that are suited to your indoor environment. Now what? Here are some tips for potting, watering, lighting and propagating your houseplants, as well as general care and enjoyment.
Containers
There is an endless variety of sizes, shapes and colors of pots you can choose from for your houseplants. The standard clay pot provides an ideal environment for a few reasons – it has a drainage hole in the bottom; it is porous, allowing excess moisture to evaporate through the pot; it is available in numerous sizes to accommodate any size plant; and the natural terra cotta color is a beautiful complement to the various greens of your plants. You just need a shard (a piece of broken clay pot), piece of screening, or cap placed over the hole to prevent soil from running out when you water. Soak the clay pot until all bubbling stops to condition it. Otherwise, it will absorb too much water from your plants.
The key to success is providing adequate drainage in your container. Regardless of the pot, if it does not have a drainage hole, add a 1 inch layer of gravel or pebbles to the bottom of the pot. Or plant in a clay pot a size smaller than your decorative planter and place the clay pot inside. This way, you can empty any excess water and prevent waterlogging your plants. You can use ceramic planters, plastic pots, tin pails, or any other container. Be creative – old teapots and nostalgic cans make great planters. Just follow the steps above to provide drainage and you’ll have a unique look!
Repotting
Many garden centers and home improvement stores will repot a new purchase when you buy a plant and container. However, if you’re using something you already have to repot your new plant, or need to replant an existing plant because it has outgrown its pot, the process is simple. Sure signs that a plant needs replanting are if the roots are wrapped around the inside when you remove the plant (usually after a year or two in the same pot), growth is spindly or not at all, or you find that the plant needs to be watered more often (in which case the soil is too porous and won’t hold water).

Use a container that is an inch up in size from the pot the plant is already in. Be sure it is clean and conditioned, if needed. Provide drainage or cover hole with a shard. Use a good quality potting soil (not topsoil – it is too heavy). Lay the plant on its side and gently knock it out of the pot, keeping as much soil as possible on the root ball. While holding the plant in the center of the new pot, with stem about an inch from bottom, fill the pot with potting soil, firming it down as you go around the plant. Water this new pot well and put it out of direct sun for a week or two.
Watering
Overwatering is the biggest killer of houseplants. Get to know the needs of your individual plants. Even plants that require lots of water will die if the roots are soggy (plants don’t like wet feet). Water as needed, until the water runs out of the bottom of the pot (keep trays under planters to collect this water – smaller pots can be grouped on a large tray). Drain this excess water away. If the pots are inside a decorative container, make sure to empty this out, too.

Use a moisture meter to check if your plants need water. Increase humidity by misting every morning or by adding a tray of pebbles under a grouping of plants but keep the water level in the tray below the top of the pebbles. If you summer your plants outside, consider the wind and temperature and check your plants often as their watering and humidity needs will change. Indoor air conditioning also depletes humidity.
Feeding
Again, don’t overdo it! Too much fertilizer will burn the roots and kill your houseplants. And it can also create spindly stems rather than lush, full plants. Don’t fertilize for the first several weeks after repotting or bringing a new plant into your environment. Let it adjust. Follow the individual plant instructions for a fertilizing routine. It’s best to keep a chart if you have lots of plants. Feed only during active growing seasons, not in the fall and winter when plants go dormant. Time-release fertilizers work well, as they provide nutrients over an extended period of time. Moisten the soil before applying fertilizers to keep it from burning sensitive plant roots.

Lighting
Lighting your plants properly can be tricky, but with a few basic guidelines you can be successful in this. Remember that very few plants can tolerate direct sunlight, and even those who can survive in shady corners still do better with a little indirect light. Most plants will adapt to anything in the range of low to medium to strong light. So, we’ve eliminated the extremes and now we can look at some other things to consider. In winter, be careful putting plants in windows as reflective snow can sunburn leaves just as it does humans. Move plants a few feet from windows. Artificial light, including grow lamps, can create additional hours of light. The plants won’t know the difference.
If your plants aren’t getting enough light, they will let you know in time. New growth will become spindly, new leaves will be smaller; lower leaves will yellow and die. If you notice this happening, move your plant – remember, they will adapt to changes.
If, on the other hand, your plants are getting too much light, those leaves that are closest to the light source will yellow and burn, and the plant will fade, looking unhealthy. Again, move it to a location with less light, or just move it back from the source.
Cleaning
What – we have to clean houseplants? Yes, they will need an occasional dusting so the leaves can breathe. Most plants (except fuzzy leaved ones like African Violets – use a cotton swab or pipe cleaner to dust them), also enjoy a fine shower occasionally, in your tub, or outside out of direct sun. Rinse them gently and let them drip dry. If there is chemical residue from the water, use a clean soft cloth to wipe them down.
Bugs/Diseases
Yes, you’ve taken care of your plants, fed them as required, given them air, water, humidity, and probably even started talking to them by now. But they still look awful! It’s probably an insect or disease that has attacked your plant. Here’s a chart of some common bugs and diseases that attack houseplants, what they look like, and what you can do to combat them.
| Insect/Disease | Description | Plan of Attack! |
| Mealybugs | White, cottony blobs on leaves or stems, especially undersides, areas not exposed to sun | Dab a cotton swab dipped in rubbing alcohol on each bug; rinse leaves with tepid spring water |
| Red Spider Mites | Tiny bugs that spin webs along veins and leaves; thrive in dry environment; leaves look webby and pale | Lay plant outside on its side and shoot with a strong hose spray; or cover top of pot with foil and swish in a deep container of warm water and mild soap, rinse well, repeat weekly as needed; mist plant to prevent |
| Aphids | Greenish white or black insects that cluster in the open and are easily seen | Wash plant with warm soapy water and rinse as for red spider mites. Watch for hatching of new bugs and repeat process |
| Scale | Small, crawly, sucking pests that attack ferns and citrus plants; digs into stems or leaf veins; hard brown shell | These attach to leaves like barnacles; dislodge with a soft toothbrush or wet cloth |
| Rot | Known as “damping off” in young plants and “stem rot” in older ones; found in the soil | No cure; always start with clean, sterilized potting soil to avoid this disease |
Hang in there! You’ve done a lot so far to get the right plants for your home; you’ve nurtured them like new babies and fought off the bugs and diseases that tried to destroy them. Now it’s time to make more! Wow!! This is where all your work pays off, getting you more plants from the ones you have and even having enough to share with friends and family. Think of the gift possibilities!
Propagation
Other than increasing the number of plants you have, the main reason for propagating plants is to replace those that are getting too leggy, or too big, or are starting to die off. There are a few ways to propagate your plants, depending on the type of plant they are.
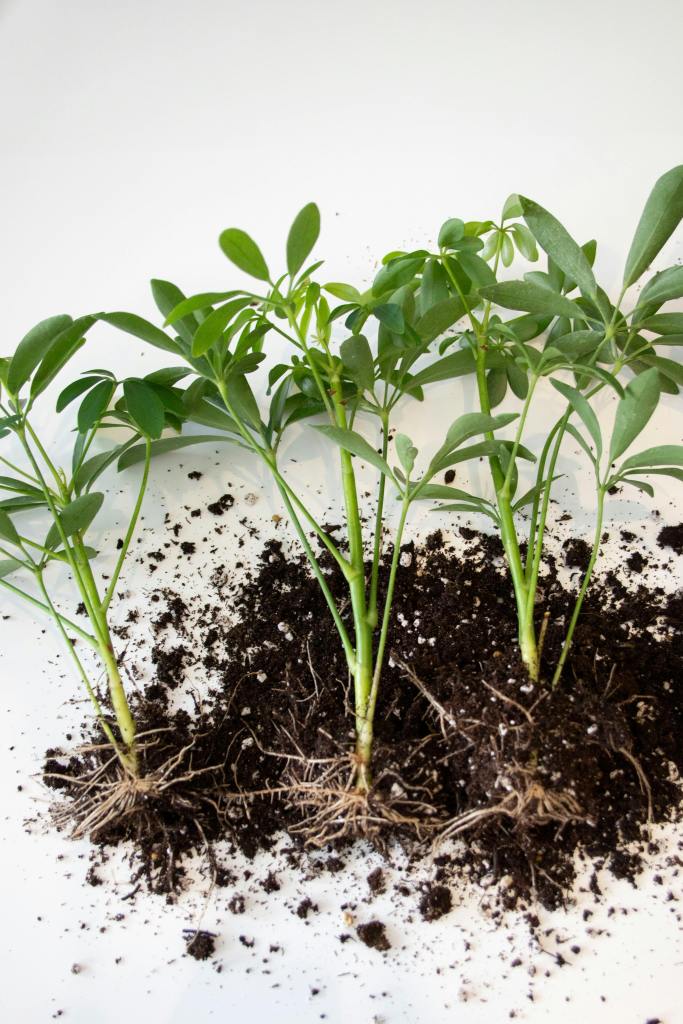
Root division
Dividing a plant that sends off new plants (clump-forming plants) is the easiest way to increase their number. Some plants that this works for are philodendron, peperomia, sansevieria, and some ferns. Thoroughly water the plant the day before dividing. Supporting the plant, turn the pot upside down and slip the plant out, tapping the pot rim if needed. Shake excess soil from the roots so you can better see the best place to divide the root ball. A few gentle tugs should separate the plants, but if the roots are wrapped around each other, take a sharp knife and cut the plant roots apart. Pot them each up quickly and water daily for a week. Keep them out of direct sun until they adjust, in about two weeks.
Stem cuttings
The most common way to propagate is by taking stem cuttings. Most will root easily in water, but these can be brittle and are easily damaged in repotting. Cut off a 4-6 inch tip, just below the point where a leaf meets the stem (the node). Remove leaves from the lower 2 inches of this stem. Dip the end in rooting powder and insert in a moist sand or perlite-peat mix (a good potting soil can be used). Water and keep in a cool, light location. To promote humidity, cover the new container with a staked plastic bag or the cut off top of a 2-liter soda bottle and create a greenhouse environment. Check in 3-4 weeks by gently removing the cutting from the mix. If roots have formed, repot. Otherwise, put it back in its greenhouse and check in another week.
Air layering
This is used for large plants with woody stems when they have lost their lower leaves due to dim lighting conditions. Make a cut partway through the stem at a sharp angle. Insert a wooden dowel or match stick to keep the cut open. Take wet sphagnum moss and wad it up into a ball around the cut. Wrap a piece of plastic wrap around the whole thing, tie it to top and bottom to secure and wait about 4 weeks. Keep the moss moist during this time. You should find the moss ball is full of new roots. Cut off the stem below these roots and pot it up. Shorten the remaining stem on the old plant and continue watering. New growth will sprout on this short stub.
Runners and offsets
Since houseplants were once found in nature and have adapted to a different environment, many of their habits have changed. However, some still send off runners and new baby plants the same as they did in nature. Those runners and plantlets are looking for a place to land and take root. In nature, they landed on the ground next to the parent plant, but in small pots they have nowhere to go. So, it’s time to imitate nature and provide a place for these plantlets to root. Set up a small pot with half peat moss/half sand mix near the parent plant. Using a hairpin or bent loop of wire, pin the new runner to the soil in the small new pot. Keep both plants moist. Don’t cut the cord (runner) from the parent plant yet! In 4-5 weeks, new roots will have formed in the new pot. Check that the new roots are set firmly in the soil. If it stays with a gentle tug, it’s rooted. Cut the runner from the parent plant and enjoy the new baby!
Leaf cuttings
Many flowering houseplants like African violets, begonias and gloxinias produce roots through leaf cuttings. Fill a jar or glass with water, cover with tight foil, and poke holes for each leaf. Be sure it’s in the water. Once you have roots, pot up each leaf. You can also try using sand or potting mix instead of water. Check for roots in 3-4 weeks.
Enjoy adding new and unique plants to your indoor environment. As your collection grows, you’ll be looking for unique varieties of plants to add. Remember, the more you know and understand each plant, the easier houseplants are to keep and enjoy.
